In this
guide for beginners we will describe how to install Windows 8.1 Pro Review in Oracle
VM VirtualBox Manager.
For this
purpose use VirtualBox version 4.2.16 or later. Setup file for Oracle VM
VirtualBox Manager could be downloaded from here
VirtualBox-4.2.16 Download
VirtualBox-4.2.16 Download
MD5: E0A35854A22EDFF0F9D9D5658A38582A
For ISO
image we have downloaded from Microsoft original ISO image Windows 8.1 Pro
Review Build 9431 (Evaluation Copy), English,
32bit, WindowsBlue-ClientwithApps-32bit-English-X1899604.iso
It will
work until January, 15th, 2014
Product
Key: NTTX3-RV7VB-T7X7F-WQYYY-9Y92F
SHA-1: 0x447CCD24EB3DC6CFD9A42E62A5F6418B578E3CBF
MD5: 23862C4495579BA48573FB4088677CBB
This ISO image
file could be downloaded from Microsoft.com
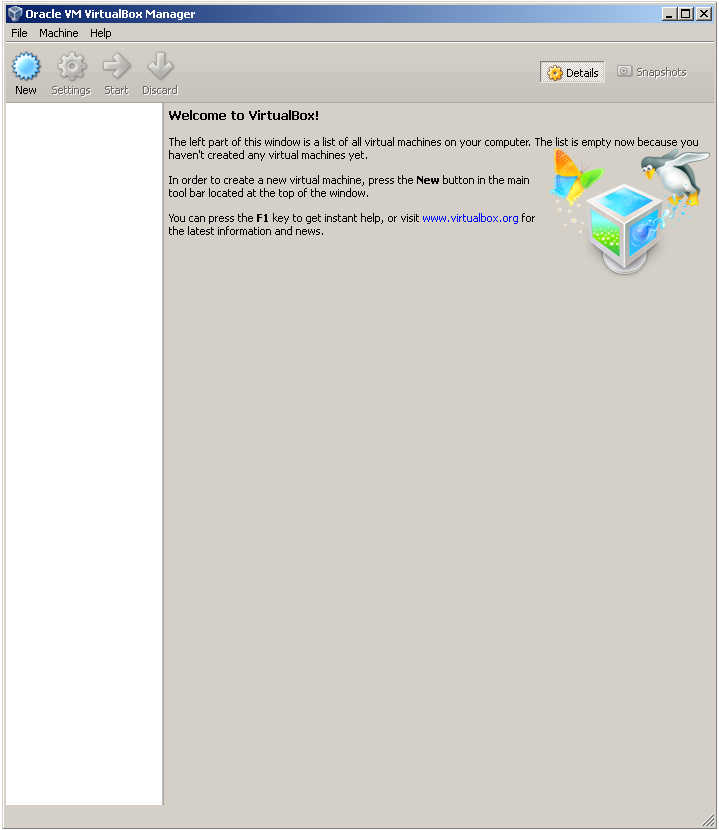
1. Firstly,
please install and run Oracle VM VirtualBox Manager.
The initial
window will appear as shown.
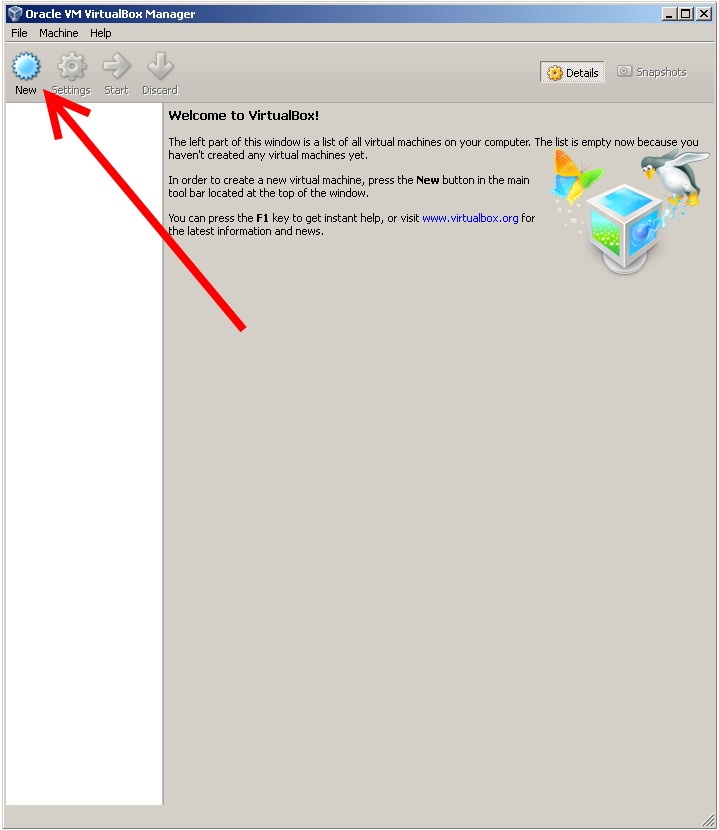
2. To
create Windows 8.1 virtual machine, please press “New” button as show with red
arrow
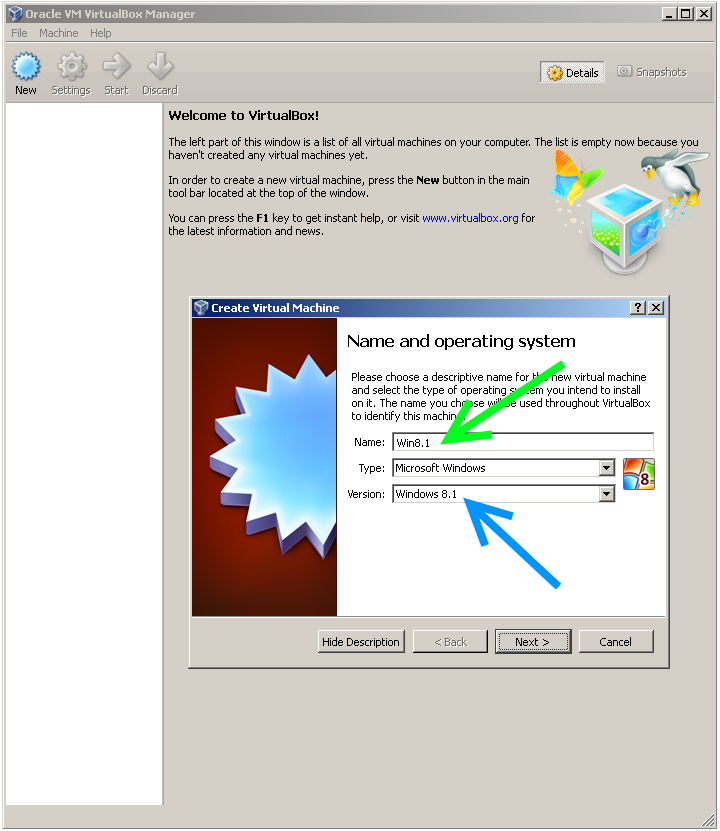
3. Select a
new name for virtual machine as shown with green arrow “Win8.1”, select type
“Microsoft” and version “Windows 8.1” as shown with blue arrow.
Then press
“Next” button.
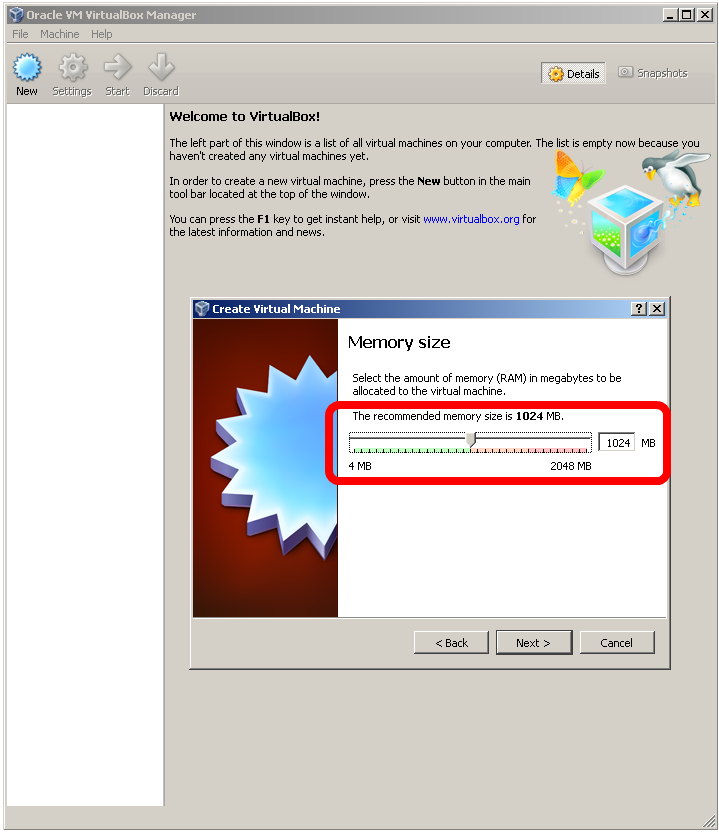
4. Select RAM size for Windows 8.1 virtual machine as shown – 1024 MB or higher is recommended
5. Create
virtual hard drive for Windows 8.1 – 25 GB or higher is recommended. Then press
“Create” button.

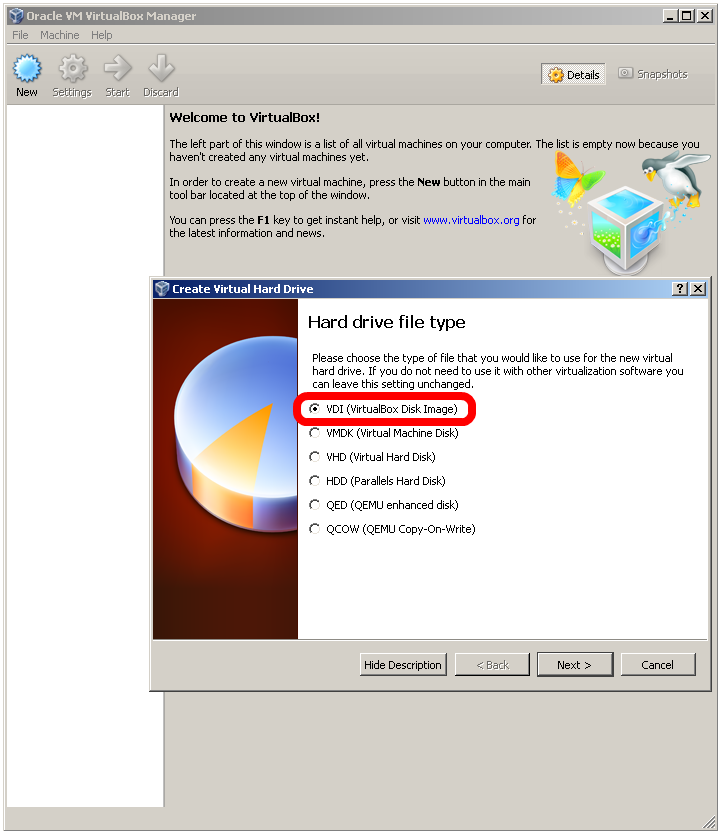
6. Please
select virtual hard drive type for Windows 8.1 virtual machine. VDI (as shown)
is the native Oracle VM VirtualBox Manager type,
VHD is
compatible with Microsoft VirtualPC software.
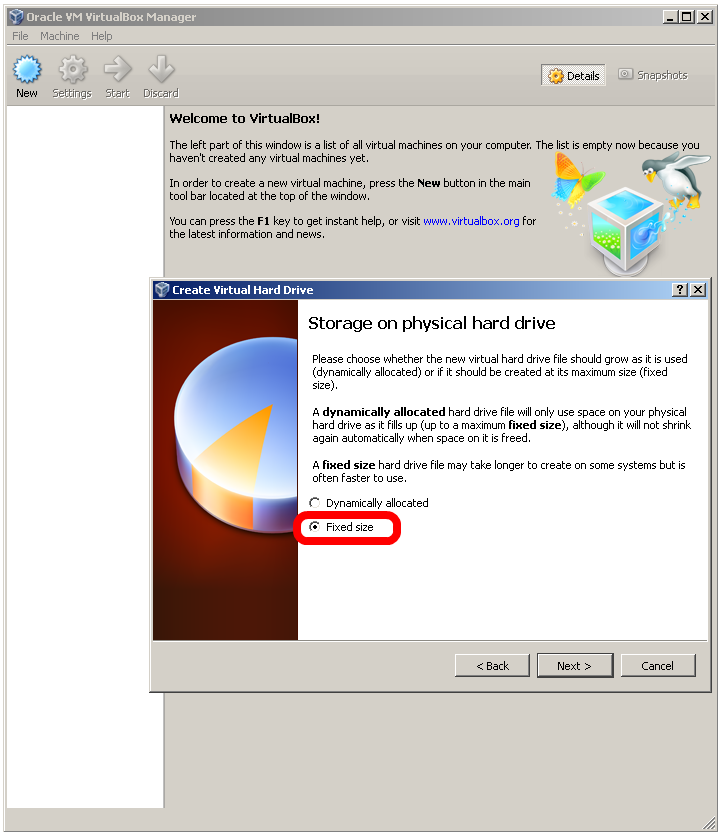
7. Please
select “Fixed size” for faster usage during Windows 8.1 virtual machine
running.
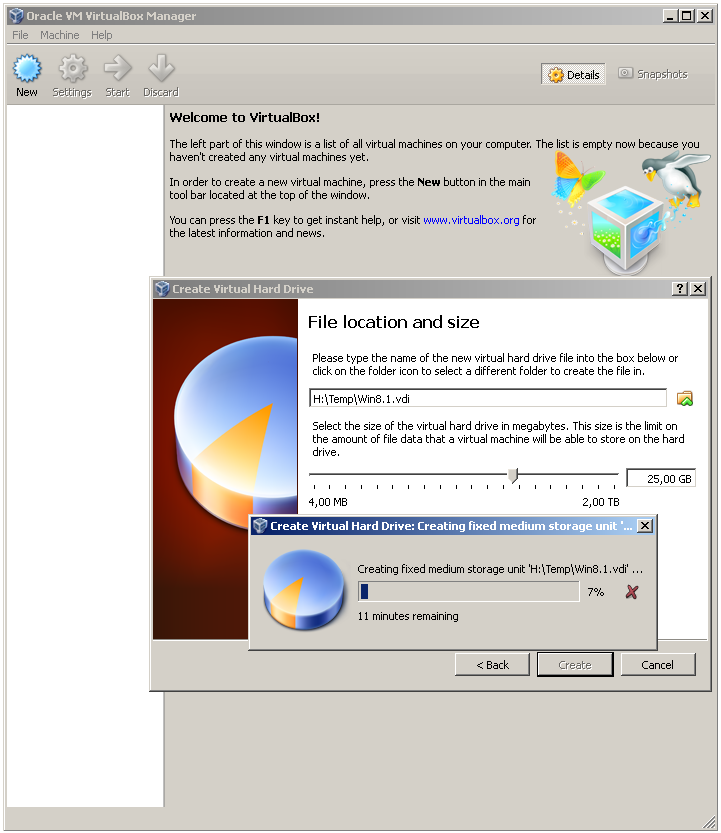
8. Select
location for virtual hard drive file on your physical HDD as shown with green
arrows, then press “Create” button.

9. The creating
of the fixed medium storage unit will take some time, so please wait for.
10. After
creating Oracle VM VirtualBox Manager will show a new listing with “Win8.1”
virtual machine.
Press
“Start” button to run Windows 8.1 installation in Oracle VM VirtualBox Manager,
as shown with red arrow.

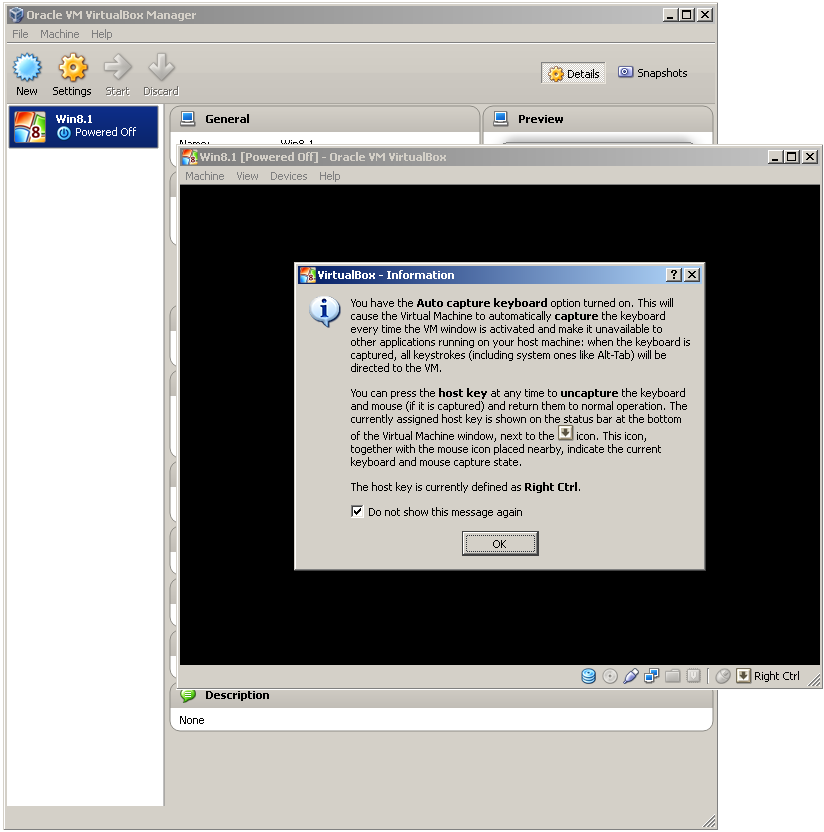
11.
VirtualBox Manager will inform us about “Host Key”, which is “Right CTRL” by
default,
check “Do
not show this message again”, then press “OK” button
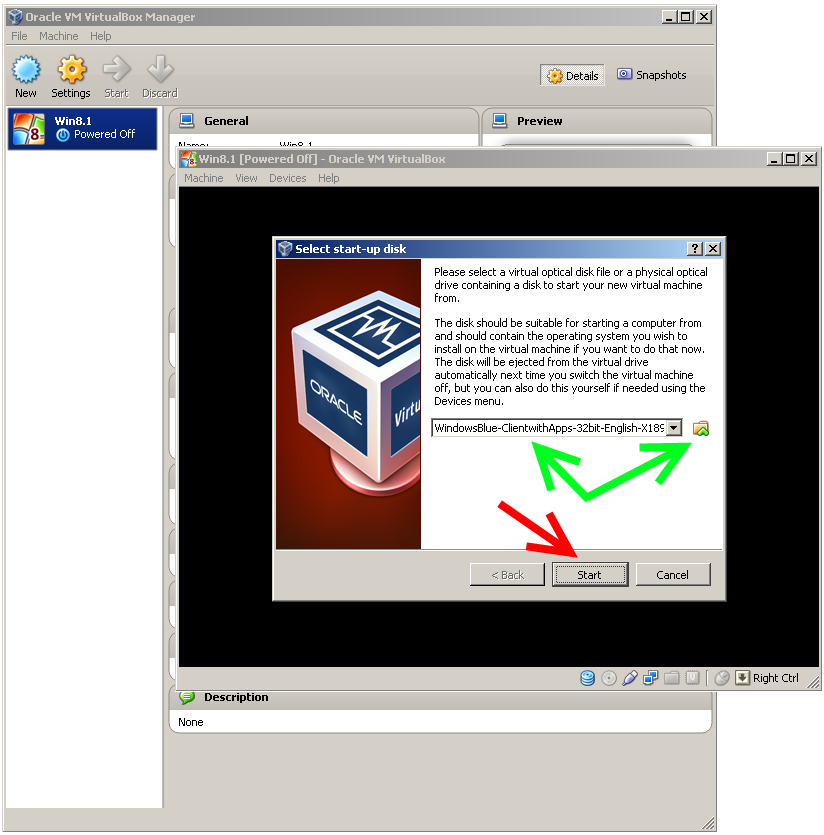
12. Now, we
need to select “WindowsBlue-ClientwithApps-32bit-English-X1899604.iso” file
path on your HDD,
as shown
with green arrows, then press “Start” button
13. First
Windows 8.1 installation screen will appear shortly.

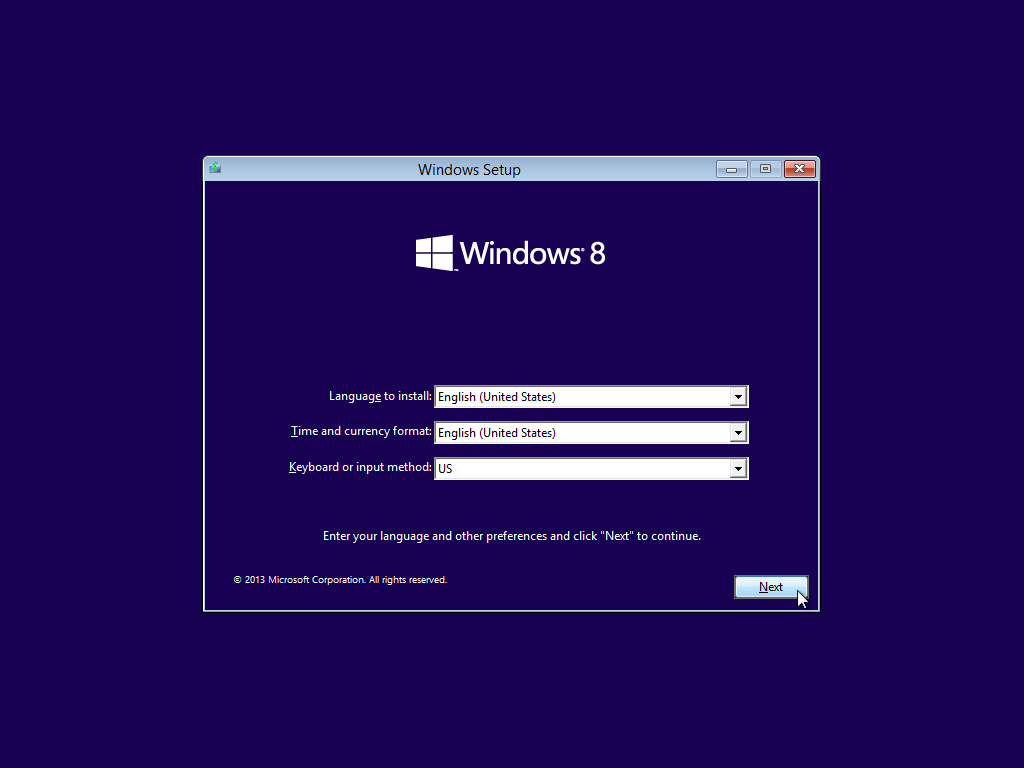
14. In a
few minutes Windows 8.1 setup window will be shown, please select “Language to
install”, “Time and currency format”, “Keyboard or input method”.
The press
“Next” button.
15. Windows
8.1 Setup is ready, press “Install now”

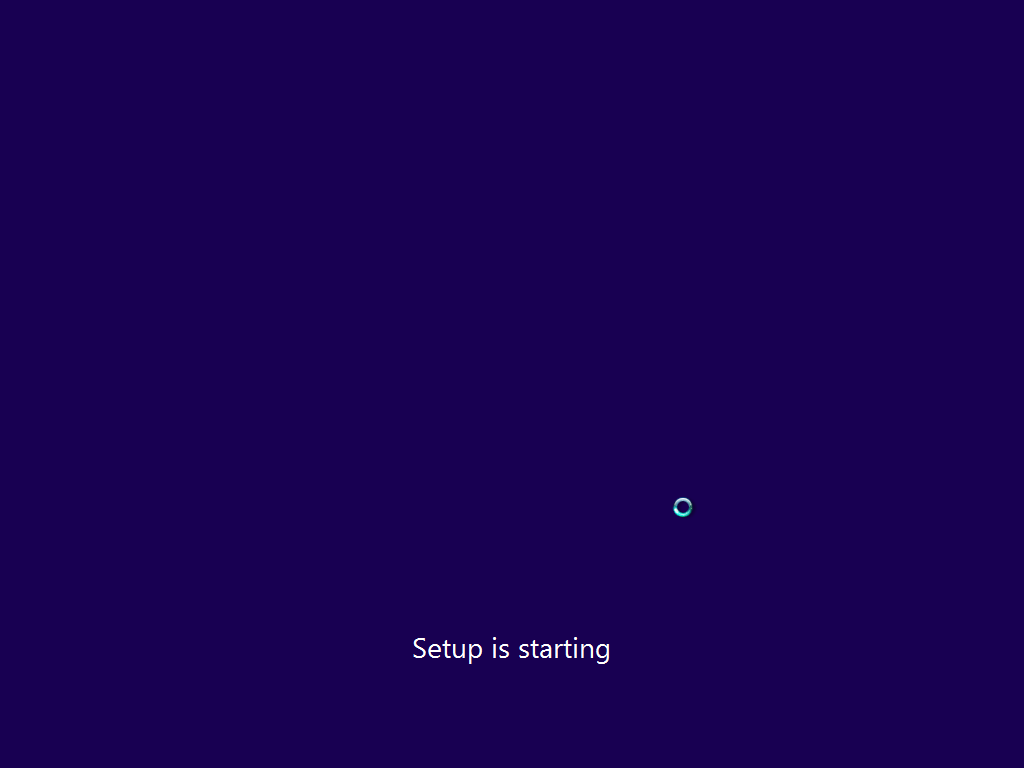
16. Short screen
message “Setup is starting” will be next on your display.
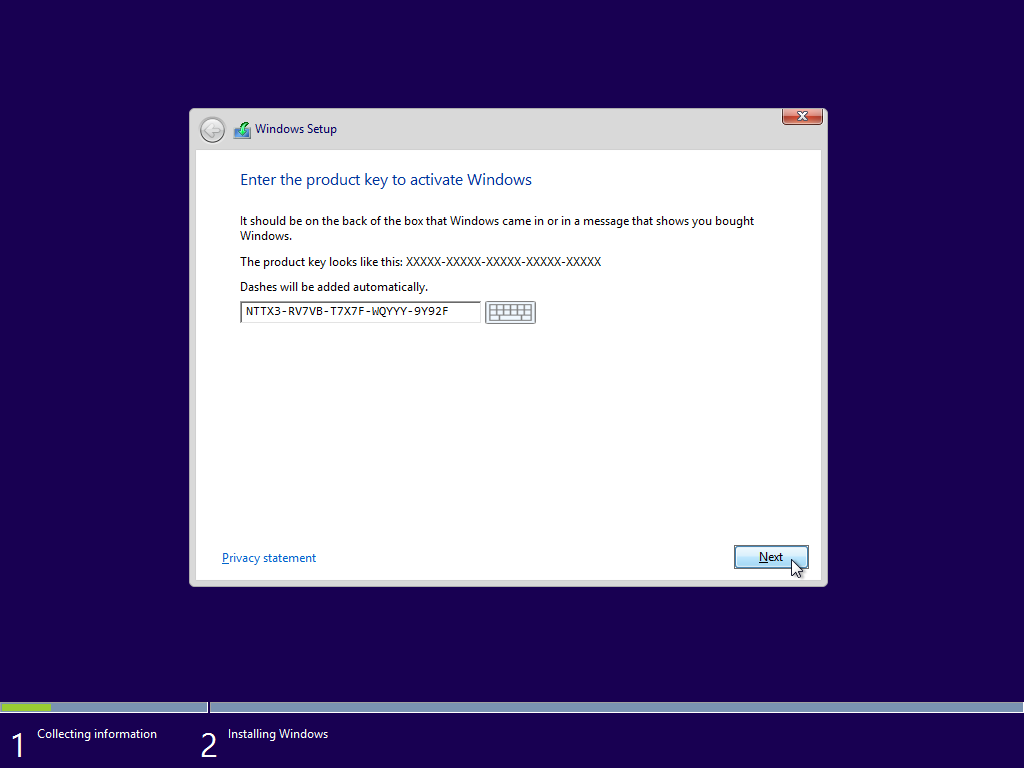
17. Please
enter the product key: NTTX3-RV7VB-T7X7F-WQYYY-9Y92F
Press
“Next” button.
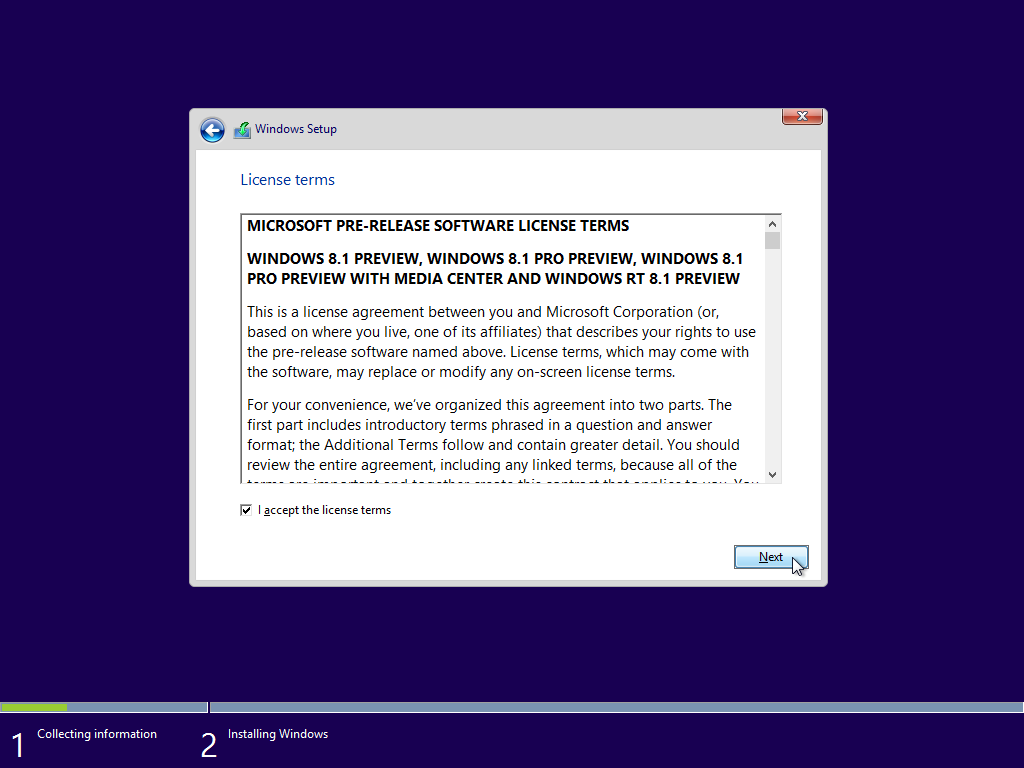
18. Please
read Windows 8.1 License terms, check “I accept the license terms” and press
“Next” button.
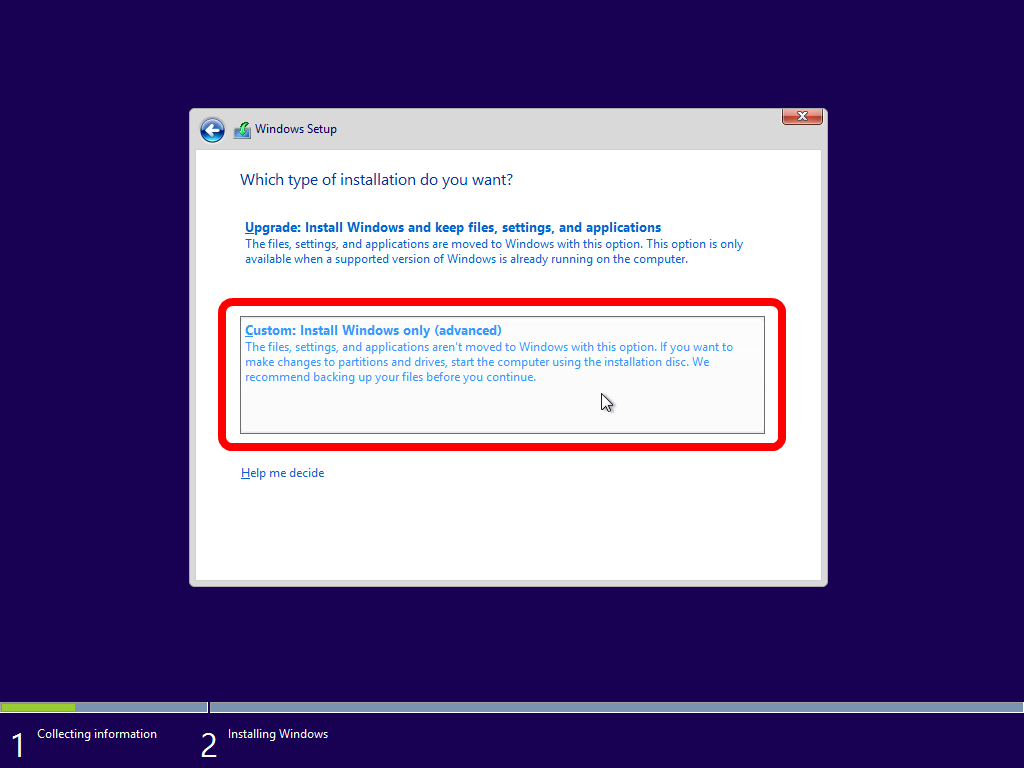
19. Then,
please click “Custom: Install Windows Only (advanced)” to execute “Clean”
installation to the virtual machine.
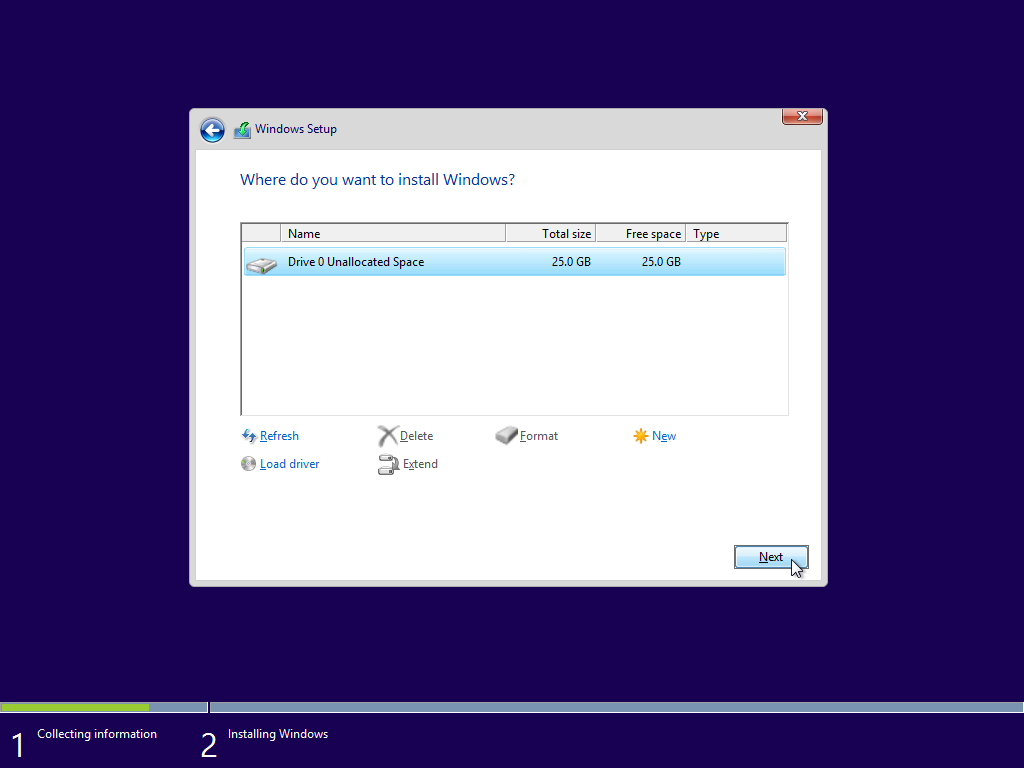
20. Select
“Drive 0 Unallocated Space” and press “Next” button
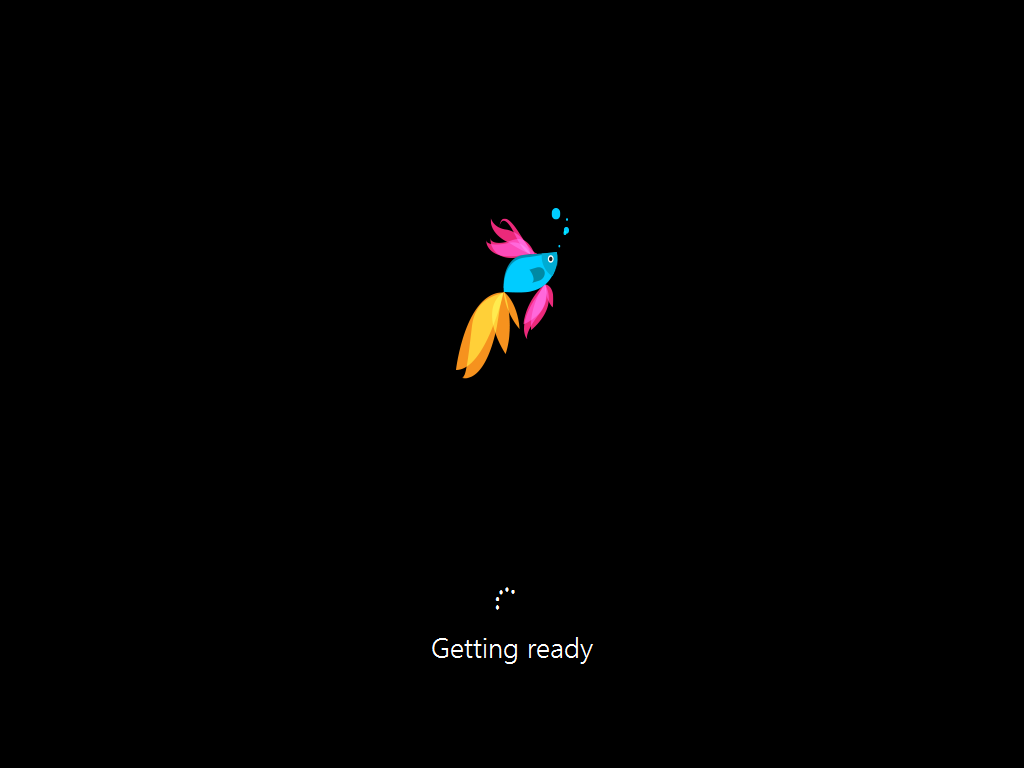
21. Windows
8.1 setup will install Windows. Wait for a while. Computer will be restarted several
times

22. When
the Windows 8.1 installation process will be near the finishing, “Getting
ready” message will be shown.
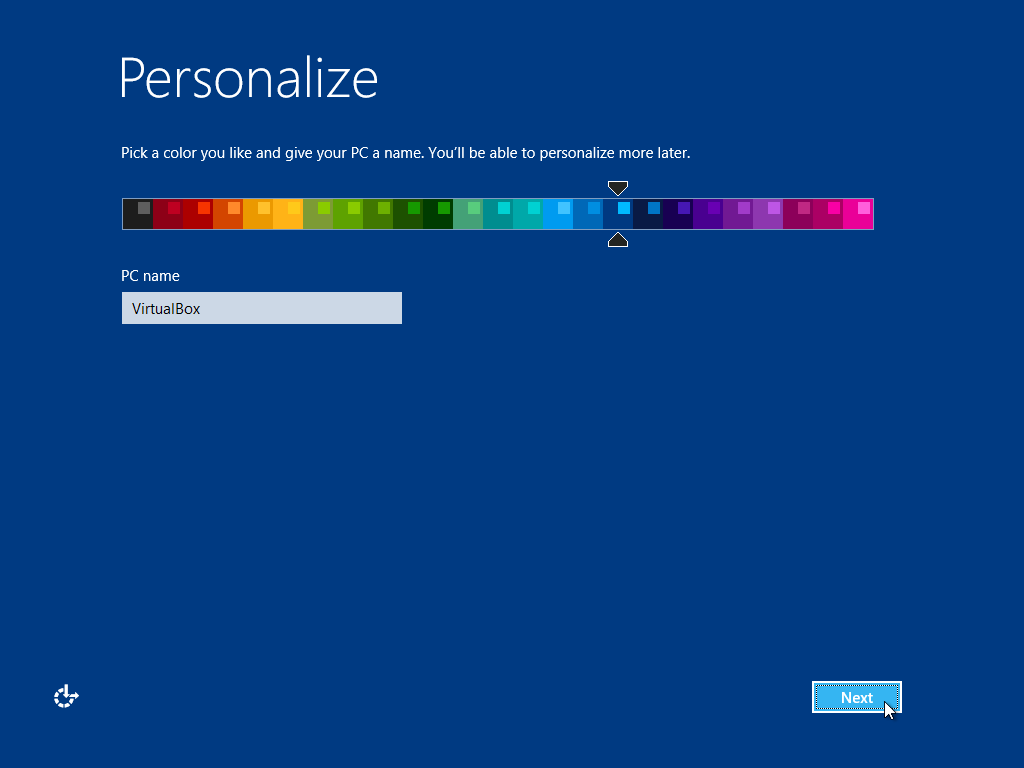
23. Now we
can select “PC name”, there are some limitations for name’s length and special
characters using, so “VirtualBox” will be fine.
Background
color for your virtual Windows 8.1 could be adjusted also. Press “Next” button.
24. For
most users please press “Use express settings” button on this step. If you
occasionally pressed “Customize” button, use “Back” button as shown with green
arrow.

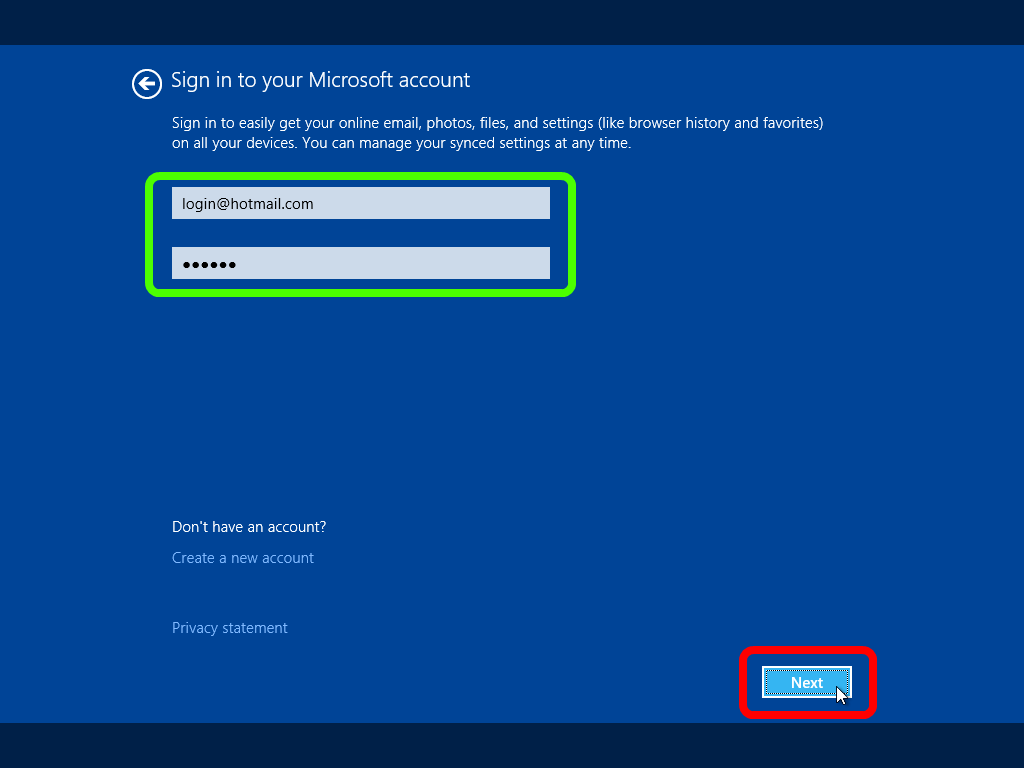
25. If you
desire to Sign in toy your existing Microsoft account, please change login and
password.
In our
guide we will show how to skip Microsoft account authorization.
26. Next
window will show message about incorrect email/password and show the link
“continue without a Microsoft account” that need to click.

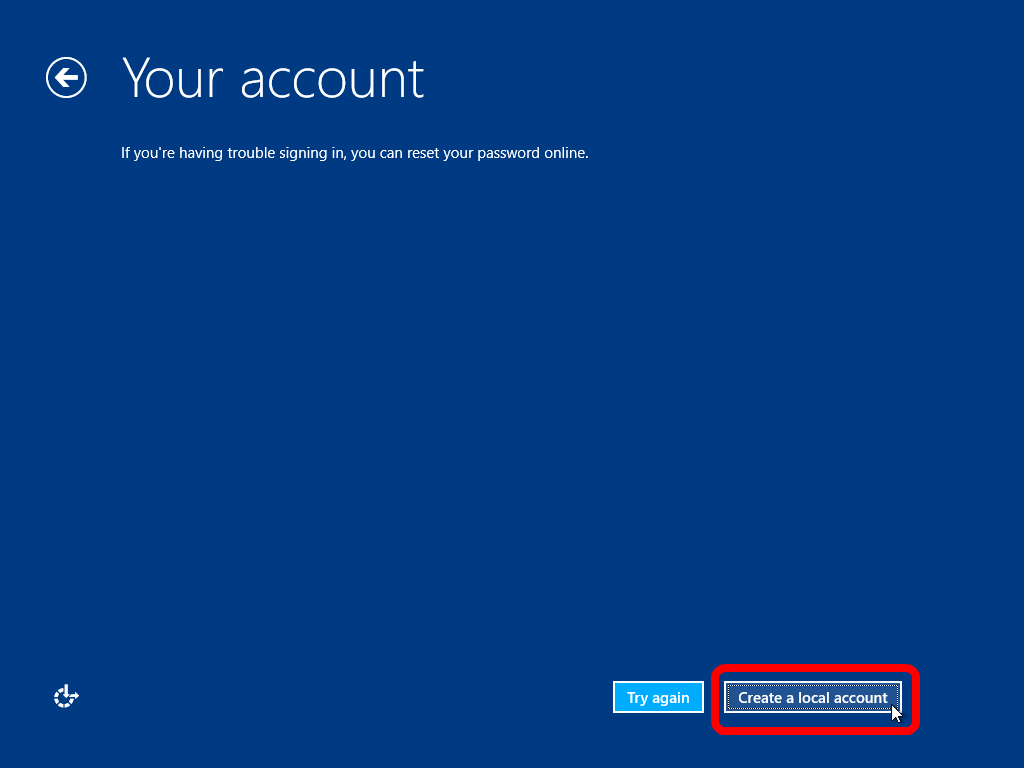
27. Now we
need to press “Create a local account” button.
28. Our
“Local account” will create user with administrative rights, so please fill
“VirtualBoxRoot” as user name, enter and re-enter password and hint for the password.
Press
“Finish” button.

29. Windows
8.1 will be restarted.
30. After
restarting Windows 8.1 setup will install “Apps”

31.
Installation of the “Apps” will be accompanied with “Getting your apps ready”

32. Color
of the screen during Installation of the “Apps” will be changing.
Please do
not turn off our virtual machine.
33. Before
installation finishing Windows 8.1 setup will show “Almost ready” screen
message.
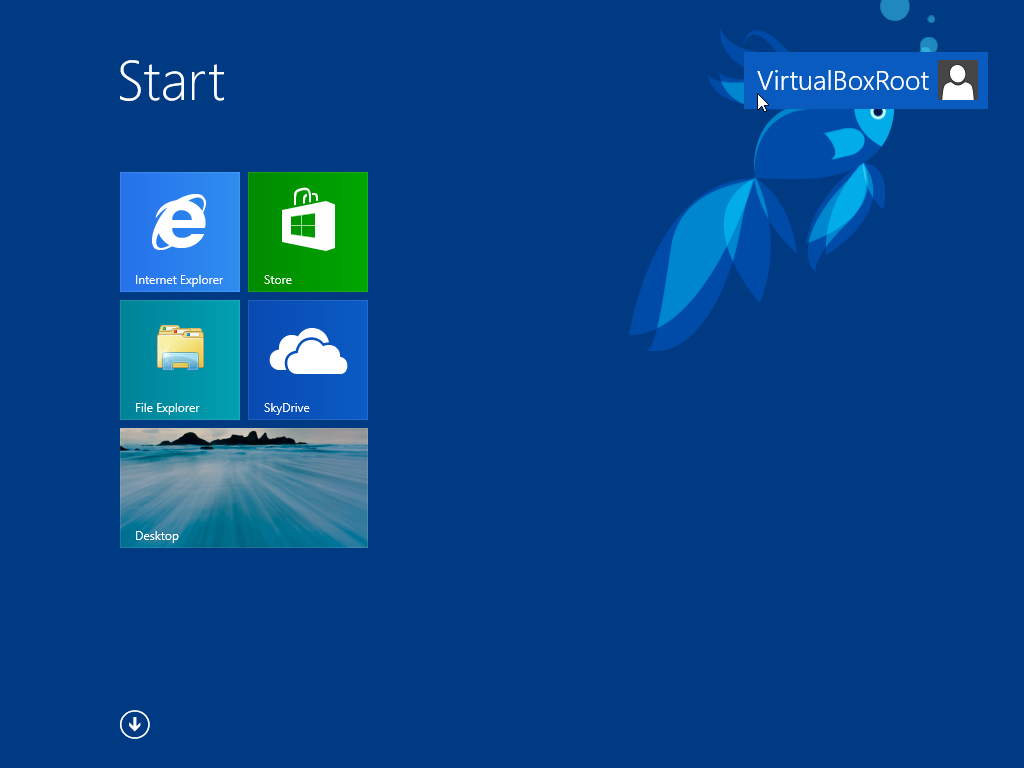
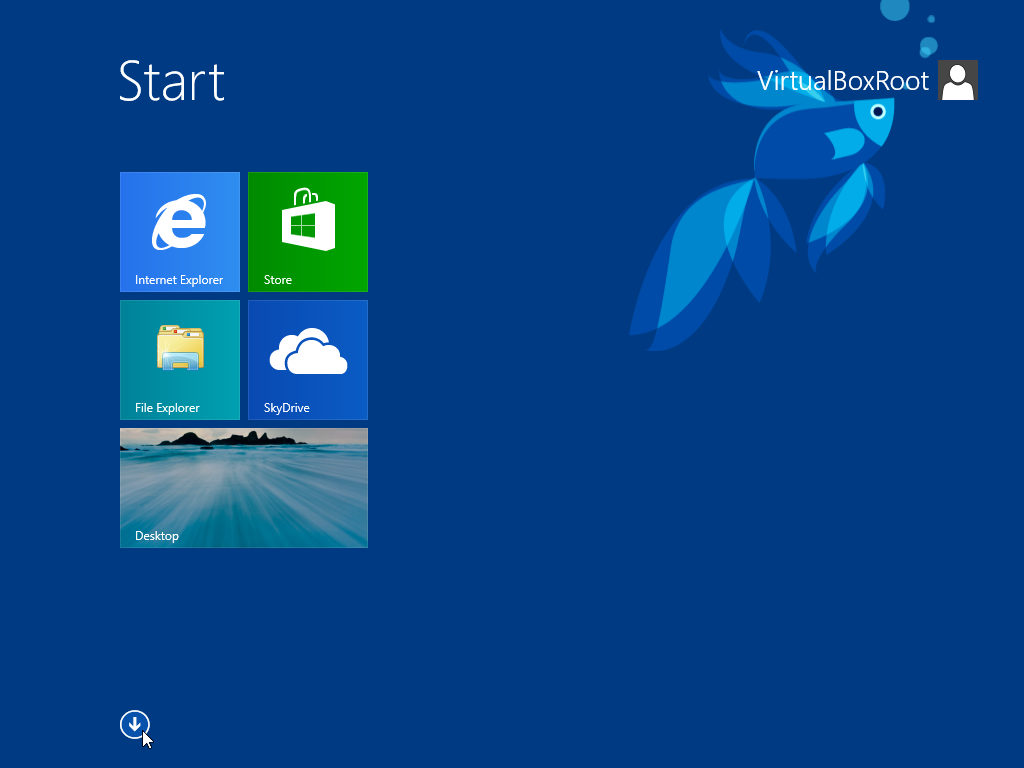
34. Wow!
Windows 8.1 is installed!!! Active user shown in the top right corner with
“VirtualBoxRoot” name.
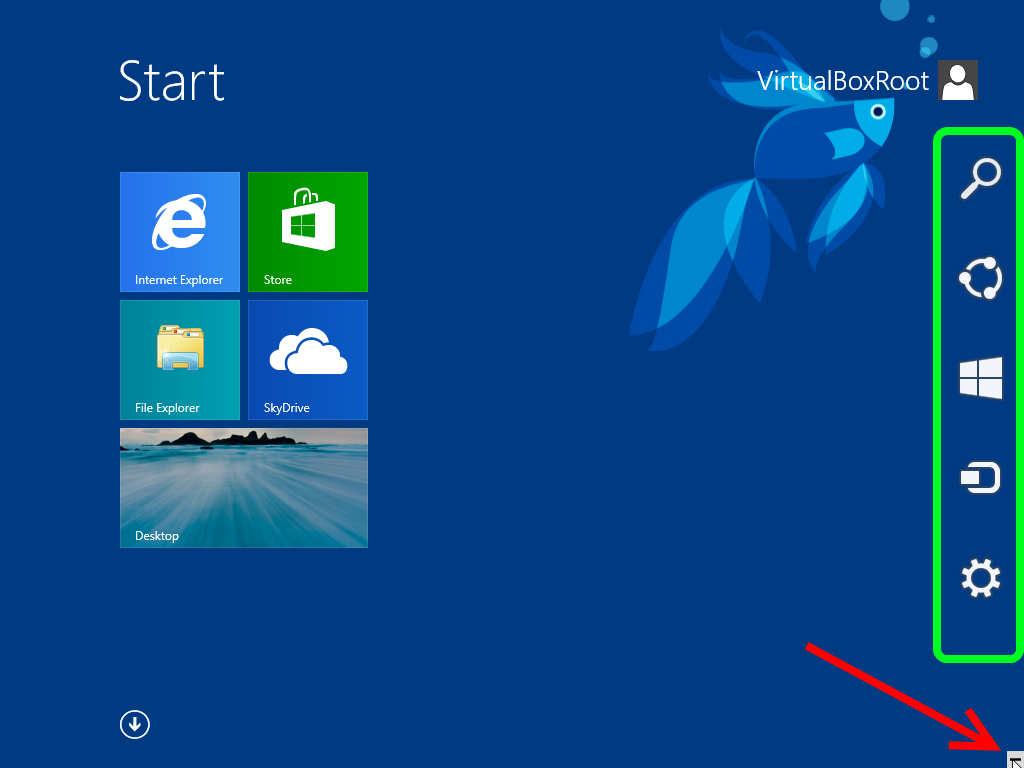
35. To view
Windows 8.1 side bar please mouse over to the right bottom button, as shown
with red arrow, and the side bar will appear.
This
feature of the Windows 8 OS family.
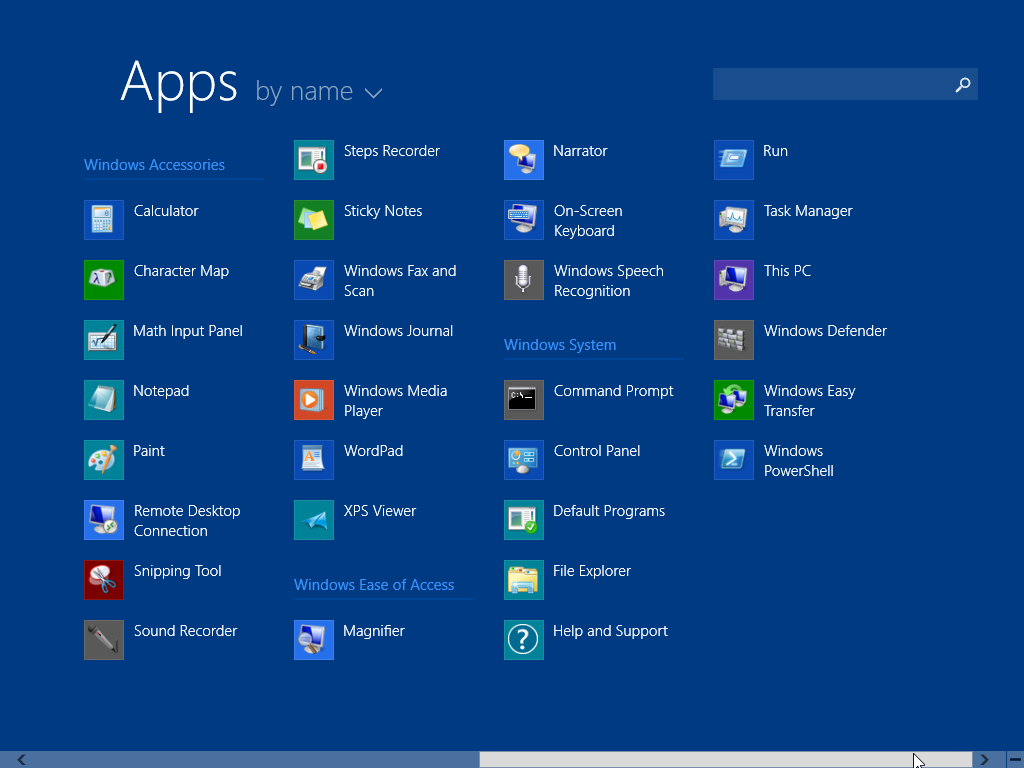
36. To
scroll down to the Apps listing, please click the button as shown with mouse
arrow
37. Here it
is the Apps listing, which could be scrolled to the right by bottom scrollbar.

38. Now we
can see another group of the applications, installed with Windows 8.1 by
default.
To view
Windows 8.1 Desktop, please scroll back to the left and press “Up” arrow
button, which will be visible if the mouse will place over scrollbar.
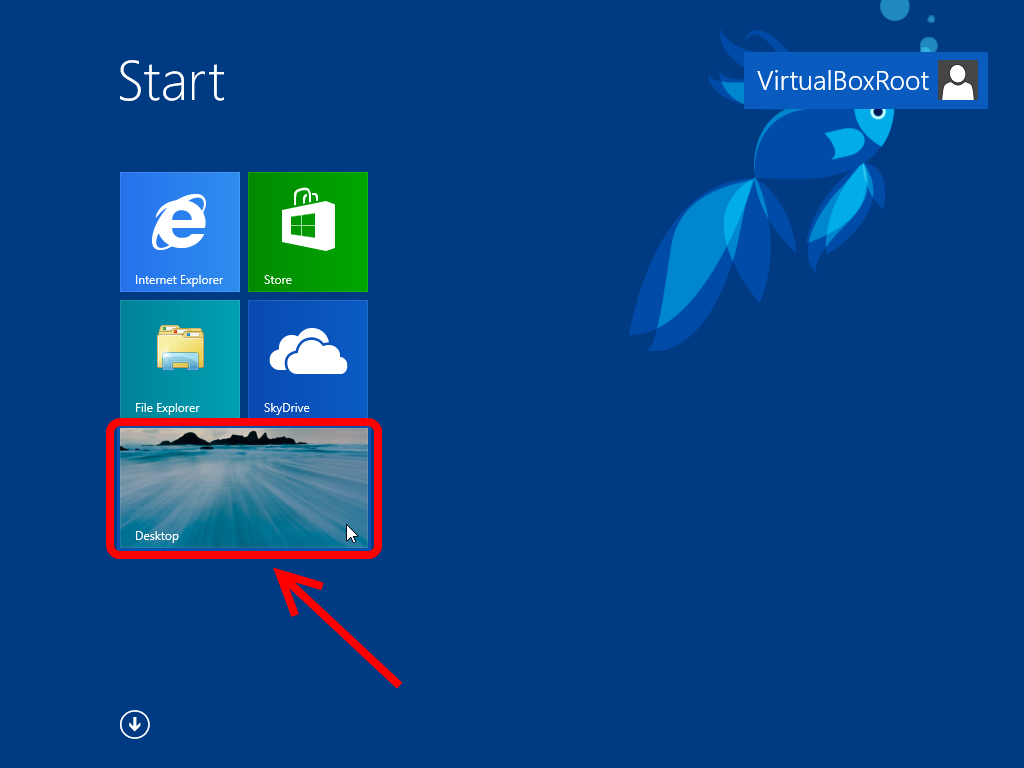
39. When
the next windows will be shown, please click to the “Desktop” as shown.
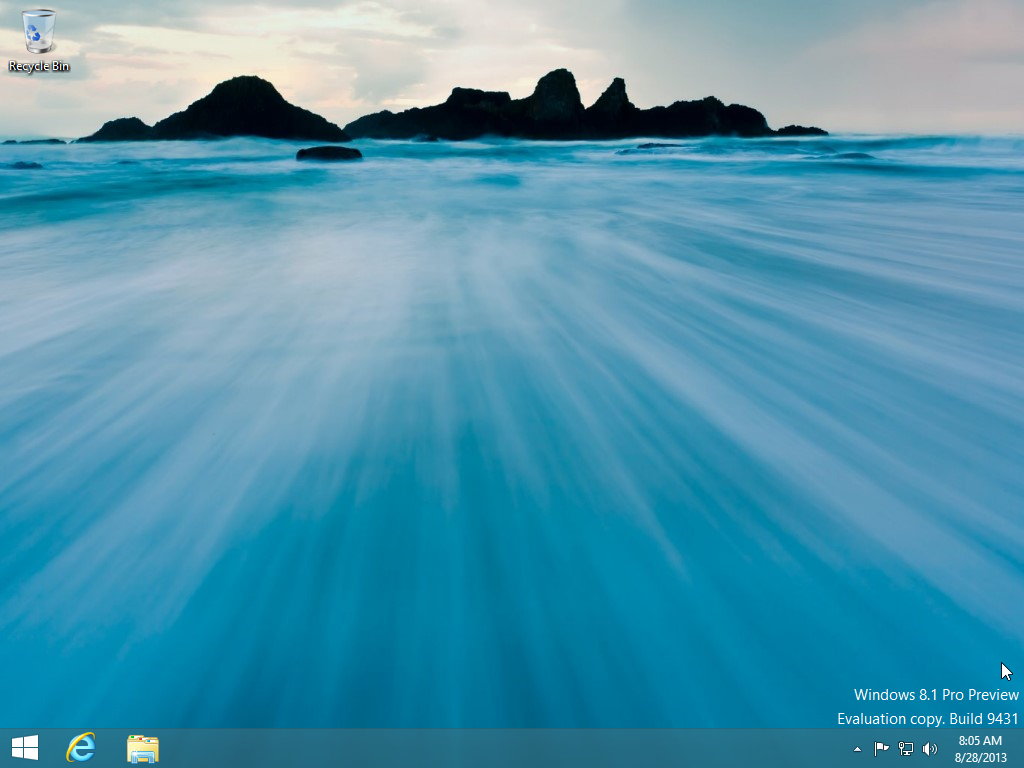
40. Windows
8.1 Desktop will be shown.
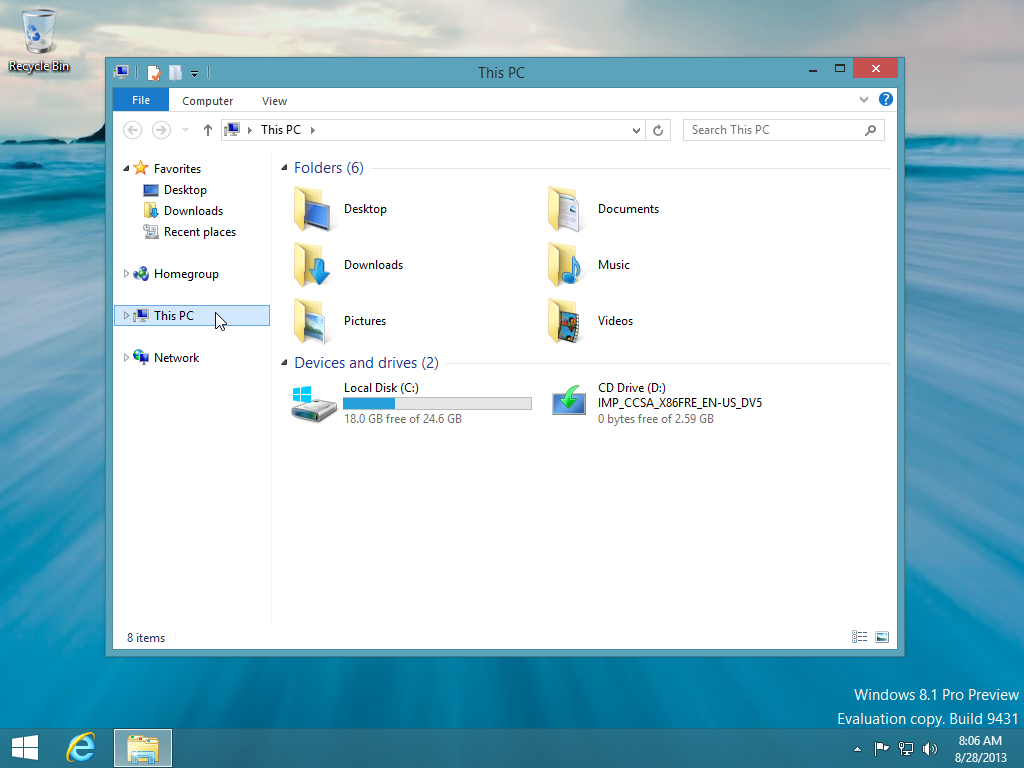
41. Press
“Explorer” shortcut on the bottom panel, the click “This PC” as shown. Folders
by default are shown.
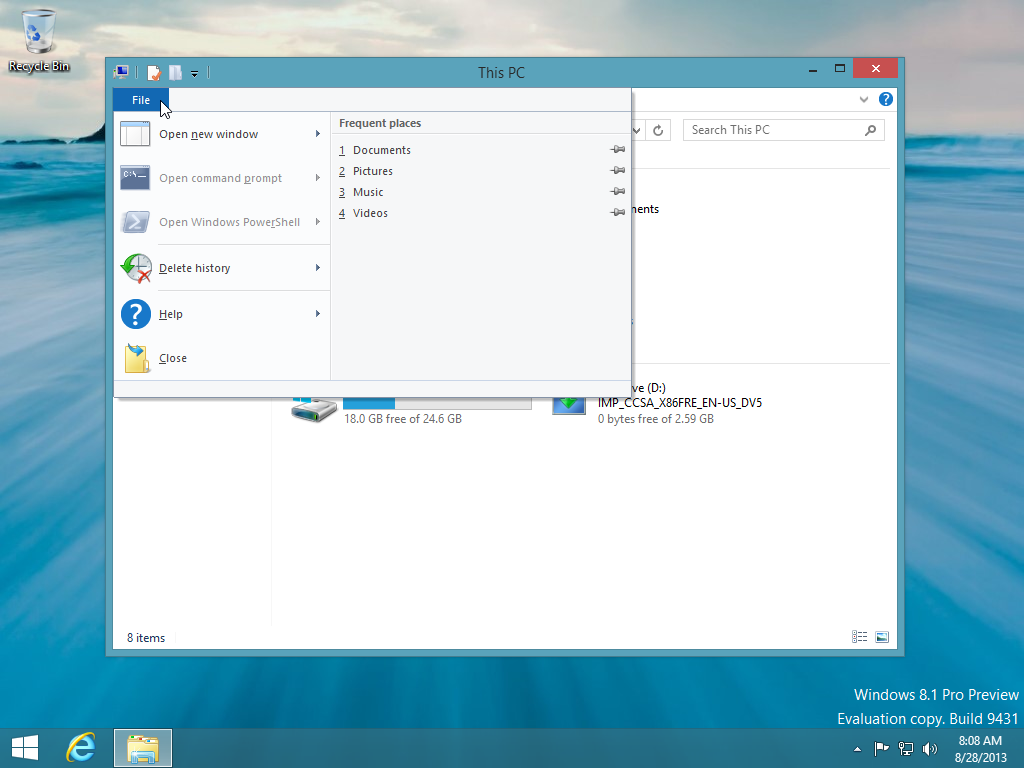
42. “File”
menu in Windows 8.1 Explorer is shown here.
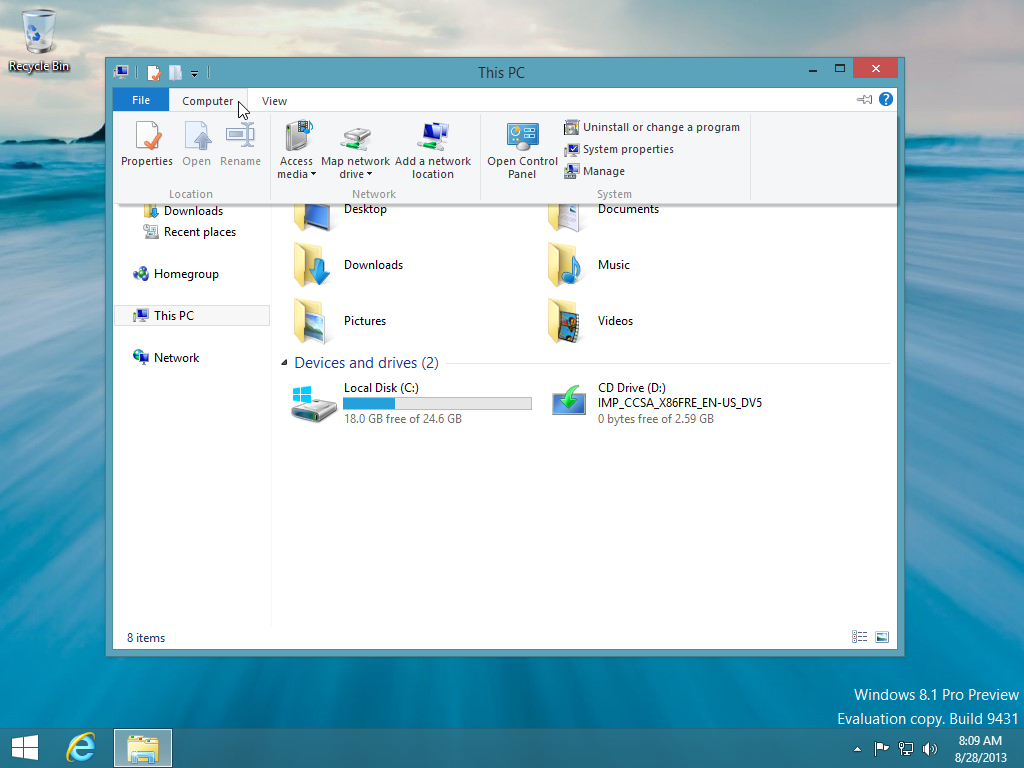
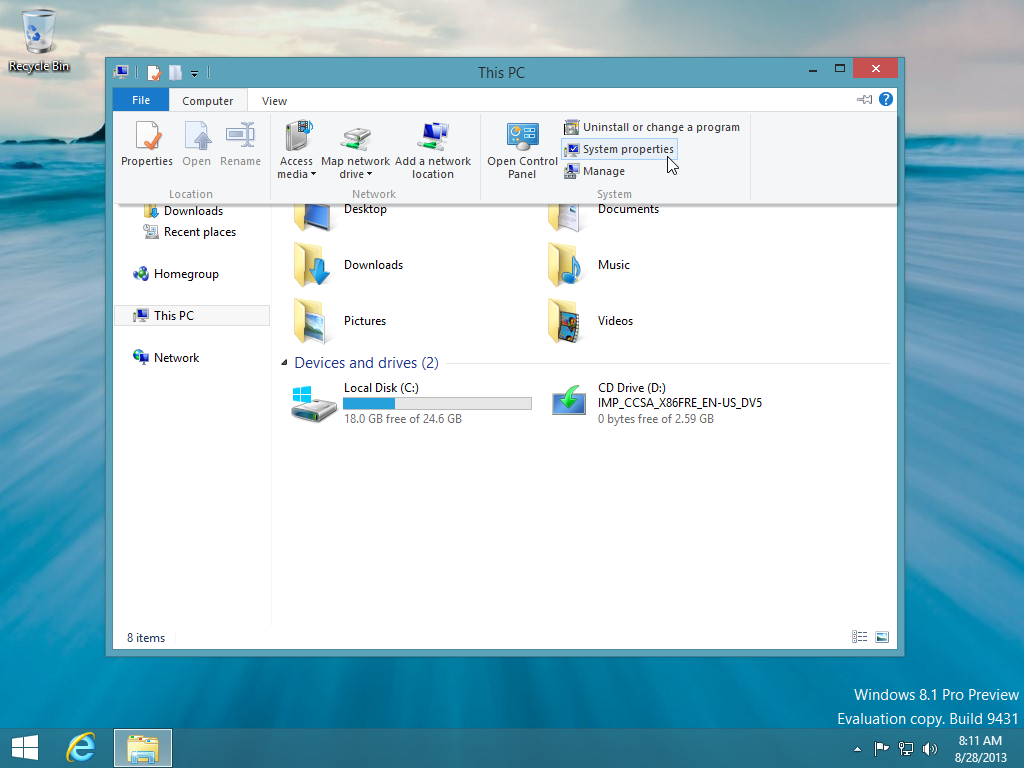
43.
Selecting the “Computer” menu will show PC panels by default.
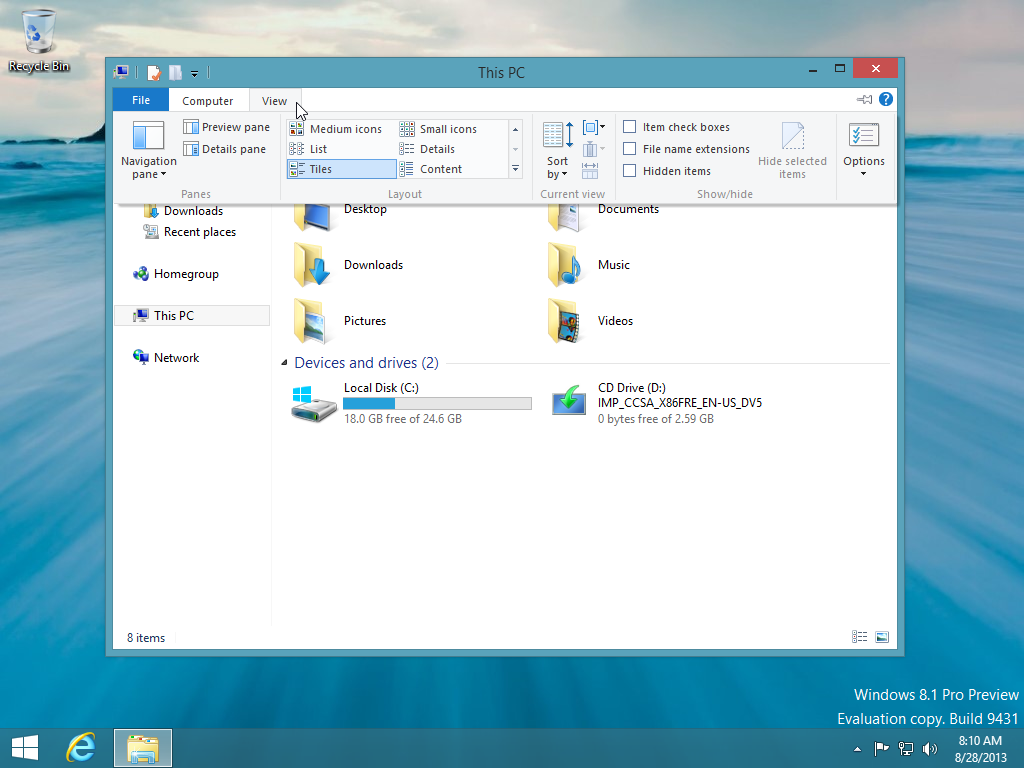
44. Selecting
“View” will show available options for Windows 8.1 Explorer viewing modes.
45. Please
return to the “Computer” menu and press “System properties”
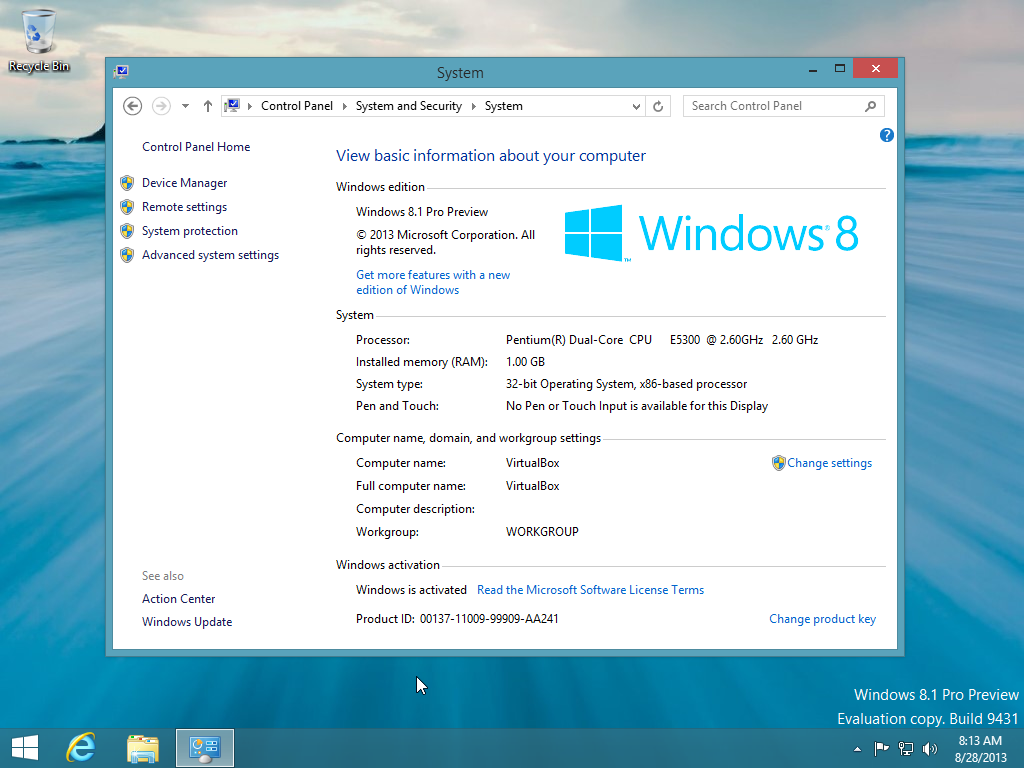
46. Your
real hardware PC processor with virtual machine RAM will are shown. Computer
name will be VirtualBox.
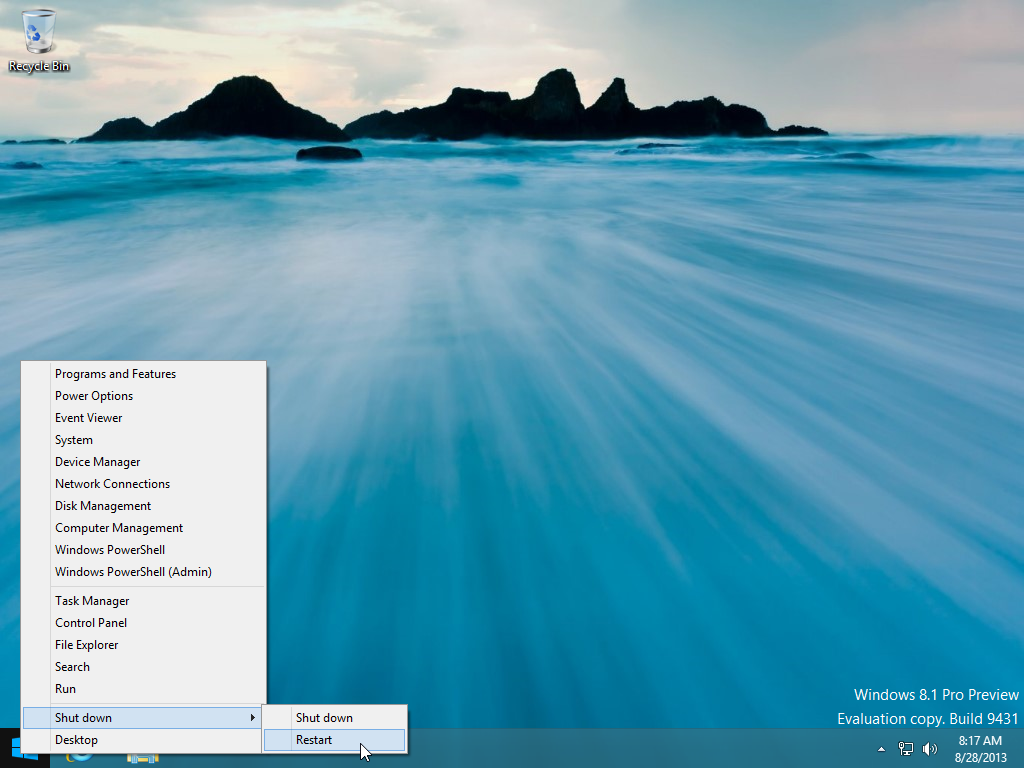
47. Now we
will restart Windows 8.1. Please right click to the left bottom “Window” icon,
contextual menu will appear.
Then select
“Shut down” submenu, then click “Restart”
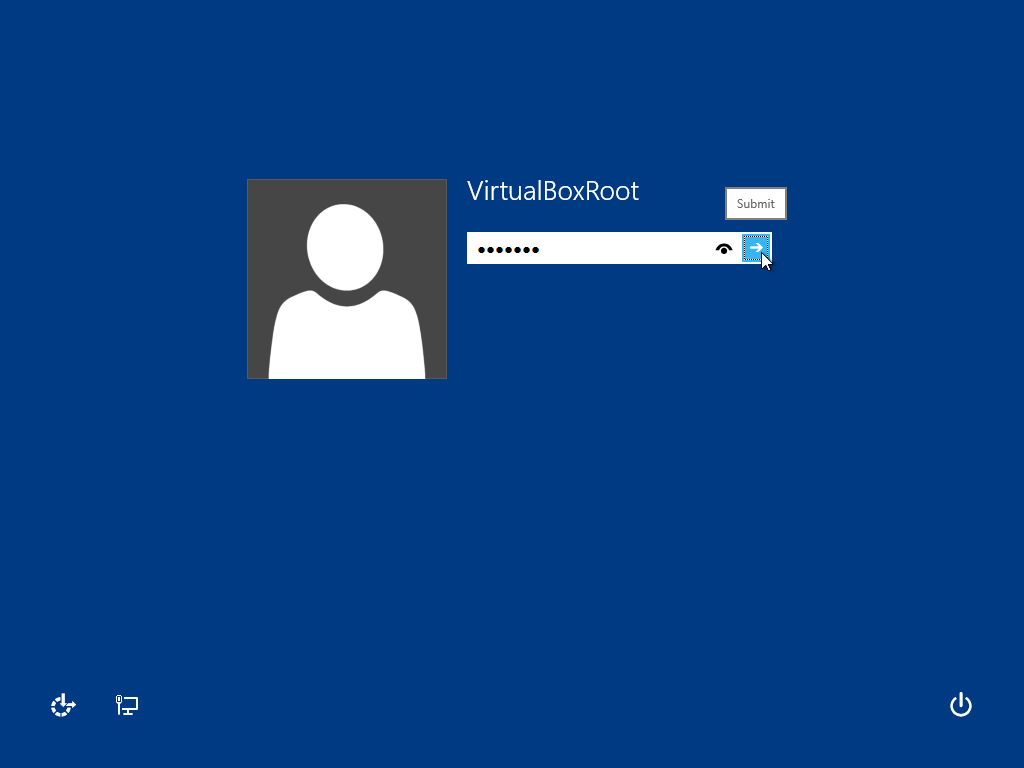
48. After
restart, please click to any position on the yellow screen with date and time.

49. Authorization
window will appear, please enter your password, the press “Submit”
50. Then,
we will see “Start” window again. Now, your Windows 8.1 is ready to install
programs you desire.
